The lost and found…

Every so often a person can find themselves lost without direction or purpose and I can honestly say I am no different. I have started and, ultimately discarded over 20 posts since I last put a recipe out here and there is no other reason than I was just not into it.  Work and frustration had beat me senseless and wore me down to the point of indifference making me feel lost.  So here I am fighting the indifference and trying to get found, again.

I know that everyone needs a reason to be or “raison d’être”.  My reason to be, as I have come to discover, is to have fun writing and figure out ways to use food ingredients to their maximum taste by utilizing all of  their flavor qualities and, not just the obvious ones.  I guess I need this blog to take my mind away from the frustrations.  To that end, I have been quietly stockpiling new recipes so that I will have something to put here and I will get them out shortly, once they make the leap to electronic format from my food notebook. Among these recipes are chicken quesadillas and a pineapple stuffed pork tenderloin. (Yes I am going to go Hawaiian on you)

Since I completed my cabbage quest, I have decided on a new quest and I believe it will be an interesting one.  The quest is to conquer vegetarian cooking in a unique way that will not only cater to those who are vegetarians but those who are not. Obviously I will use only vegetables or vegetable based products but I want to come up with entrees and sides which will not just be, “the same old thing”  because, face it, boiling, and steaming seem to be the main way folks get vegetables done and frankly that is boring.  There are folks out there that destroy vegetables by boiling them into a mush and serving them in a shapeless heap on the plate. (It really should be a crime.) I want to change that and I am fully aware that there are chefs and cooks out there that are way more talented than I am but, I want to see if I can do something new. I am imagining a twist on sweet potato hash, vegetarian chili, nifty lasagna riffs and a whole hearted effort to extract all the flavors I can from various vegetables without breaking the bank.

On a different note, there is an awesome new blog out there that is a must see if you love well written pieces about unique and interesting things about New York City.  The blog is wander woman-nyc (https://wanderwomannyc.com) and is written by the lovely and talented Jess G.  You owe it to yourself to check this out and visit some of the places in New York City she describes in her writing.

Until Next time,

Enjoy!

The Well Fed Cyclist

Gary Bechard

Things that go “Bumpily” into the night…

I know it has been a while, for those of you that follow this blog, and I apologize for not being more diligent in my writing endeavors. However, today I have a couple of things that I have been researching which are now ready for “prime time” that I would like to share. The first thing, and I will state this up front, no, the featured picture is not of Martian pyramids discovered by the NASA’s Mars Curiosity rover nor are they sound proofing material or a sadistic mattress pad. The picture is of a silicon baking sheet which is dishwasher safe and helps create a nice crispy outer layer on those items which could be fried (chicken wings, breadcrumb coated chicken breasts, etc.) only without the oil and related slipperiness associated with deep-frying stuff. The sheet also works for items such as zucchini strips or eggplant cubes you may want to serve as appetizers for your next big shindig. The sheet fits in the bottom of a regular cookie sheet or can be trimmed to fit smaller cookie sheets. I got this one at Bed, Bath and Beyond for not a whole lot of cash.

Next, have you ever wondered what in the world you can do with the grocery store rotisserie chickens after the regular meal? Well, we had some leftover chicken I had deboned  from a previous meal and was getting hungry for lunch when I was trying to figure out what to do with the cup and a half of shredded leftover chicken. Not wanting to go down the traditional chicken salad route, I decided to do a taziki sauce to mix with the chicken to make the chicken salad.  Doing taziki sauce instead of mayonnaise helps eliminate the “I’ve got a bowling ball in my stomach” feeling especially during warmer weather. Below is the recipe for a simple taziki sauce which does not have the traditional garlic (you could add a couple of minced cloves if you want to or even a hint of mint) which worked great for this recipe.

I started with 1 1/2 cups of shredded chicken then…

Simple Taziki Sauce

Ingredients:

1/2 – Medium cucumber, peeled, seeded and very fine diced (you can also use an ½ an English cucumber if you are not in a seeding kind of mood)

8 oz (1 cup) – Cold plain Greek yogurt (either full fat or fat free will work)

1 tbsp – chopped dill, fresh

1 tbsp – Extra Virgin Olive Oil

1 1/2 Tbsp – freshly squeezed lemon juice (about 1/2 a lemon) in case you are thinking otherwise, please squeeze a real lemon, you’ll thank me for it)

1/2 tsp – salt, or to taste (some of us are saltier than others)

1/8 tsp – Coarse ground black pepper

A pinch – Red pepper flakes

Construction Instruction:

In a large bowl, combine all of the ingredients and whisk together until all the ingredients are evenly distributed. Cover the mixture and place in the refrigerator to chill before use.

This sauce is good for a wide variety of uses from dips to garnish even making chicken salad.

Enjoy!

The Well Fed Cyclist

Gary Bechard

There’s a conflict in the kitchen?

I need to explain myself regarding the title. There is this small outdoor restaurant in Pittsburgh called “Conflict Kitchen” which does recipes native to a place that is in conflict with the United States.  They do the recipes for usually 3 to 4 months and then change to another area of the world with the same criteria.  The latest place was Cuba and the recipes were awesome! Perfectly cooked black beans and rice, shredded pork done in their “Mojo” marinade and shredded beef done in tomato sauce, and other yummy flavors of course, which was to die for.  I applaud the chefs who put this food out and I have to say the food was better than what I had in Miami.  This restaurant was the inspiration for my Mojito marinade.

Sorry there was no post yesterday but it was the last leaf roundup before winter sets in up here and it took a bit of time.  If you have been following the latest posts, I told everyone  that I was working on a new pork (and chicken for those who roll that way) marinade based on the rum drink the Mojito.  Little did I know that another name for “Mojo” marinade is “Mojito” marinade and everyone has pretty much the same take on it.  I wanted to do something different, my own spin, so to speak. The result is a marinade that is kind of a marriage of the rum drink recipe and a traditional Mojo marinade.  I used the marinade on boneless pork chops which I seared off in a pan before popping them in the oven at 325 degrees for about 45 to 60 minutes.  I served them with black beans and rice and a nice cucumber salad.  Without further delay, here is the recipe.

Not Your Mama’s (Mojito marinade for pork and chicken)

Covers 1 ½ to 2 lbs of meat

Gary Bechard – The Well Fed Cyclist

Ingredients:

1/3 cup – Extra virgin olive oil

1 oz – White rum or you can substitute 1 tsp of rum extract

8 to 9 – Mint leaves, chopped

1/8 to 1/4 cup – Cilantro, chopped

2 to 3 limes – Juiced, (the limes I used were pretty large as limes go so you may have to use more as you want to have about 1/4 cup of juice)

1/2 cup – Orange juice

1 tbsp – Brown sugar ( I used a minimally processed sugar)

5 – Garlic cloves, chopped

1/2 tsp – Ground cumin

1 1/2 tbsp. – Dried oregano leaves

1 1/2 tsp – Lemon peel

1 tsp – Coarse ground black pepper

1 tsp – Kosher salt

Construction Instruction:

Combine all ingredients in a large glass bowl, whisk until thoroughly combined. Cover the mixture tightly with plastic wrap and leave at room temperature for at least 30 minutes. You are really going to want these ingredients to become intimate. Once this mixture has set for the requisite amount of time put your pork or chicken in a large plastic bag that seals very well, add the marinade and allow the combination to set in the refrigerator for at least an hour. The longer you marinate the better the flavors are going to be.

Enjoy!

The Well Fed Cyclist

Ain’t so shabby and possibly a bit crabby…

I told you yesterday that crab was on sale, and well maybe I over purchased, but something good did come out of it. I believe I am now “one” with the seafood aisle. However, being one with any aisle in the grocery store may be a dangerous or at the very least expensive, thing to be but if something is on sale and it looks good, I get it and see what I can do with the ingredient. Before I forget, there are some ideas that in the process that may become recipes soon, mojito marinaded pork (cannot decide on what cut to use at this point) and, I know it may seem excessive but another form of stuffed cabbage.  The cabbage of choice this time will be savoy and the filling finely chopped chicken and other goodies.

You know funny thing happens to me when I hear someone say things about food and this recipe is no different. I was flipping through channels the other day and I heard someone on the television say the words “crab rice”. I did not pause on the channel or go back to find out why they were saying crab rice but it planted a seed. Now to most people those two words would not conjure up any type of response except perhaps maybe revulsion or a “why in the world would anyone do that?” question. I am different, as can be attested by most people who know me, because my mind went straight to, ” I wonder what I could put in it? and how do I preserve the delicate flavor of the crab?”. The result of some deep thinking about it is this recipe (yes, yes, I do deep thinking about food, okay?) . Interesting note, the crab rice was also excellent cold on tomato slices with a bit of balsamic vinegar as a dressing. Who knew?! Now without further delay here is the recipe.

Not so Shabby Crab Rice

Gary Bechard – The Well Fed Cyclist

Ingredients:

1 lb – Crab meat ( I used  lump (it was on sale you know) but if your tastes extend to the less expensive use claw and back fin)
1/2 – Red bell pepper, diced small
1/2 – Green bell pepper, diced small
3 1/4 inch slices – Sweet onion, diced small
1 cup – Green onion greens, chopped (about ¼ inch pieces are good)
3 cloves – Garlic, diced fine
¾ cup – Diced mushrooms (I used a mixed mushroom blend that uses Cremini, Portabello and Shitake)
¾ cup – Parsley, fresh, chopped fine
1 cup (uncooked) – Wild and Basmati rice blend prepared according to the instructions (leave the rice on the firm side)
Note: I did not use instant or quick cooking rice for this recipe because it tends to get mushy
1 tsp – Lemon pepper
¾ tsp – Cayenne pepper
¾ tsp – Celery salt
Extra Virgin Olive Oil

Construction Instruction:

Preparation –
Prepare the rice according to the package instructions using vegetable stock instead of water. You will want to make sure that the rice absorbs all of those nice flavors. Once this has been completed set this aside and begin to prepare the vegetables. Dice all vegetables before beginning because you will put them in the skillet according to their firmness. This will help you maintain the integrity of the vegetables. (And so they will actually look like vegetables when you are done.)

In a large skillet (mine is 12 inches across and 3 ½ inches deep), pour a couple of turns around the pan of the Extra Virgin Olive Oil and bring up to temperature remembering to keep the heat at around medium or lower because olive oil has a pretty low smoke point and you do not want to burn the oil. Once the oil is at temperature, add garlic, red and green peppers and the sweet onion and sauté until onions start to become translucent and peppers begin to soften (about 3 to 5 minutes). Next, add the mushrooms and continue to sauté those until they begin to get soft (about 1 to 2 minutes) and last add the green onion greens. Turning down the heat push the vegetables to the side of the pan and place the crab meat in the center and slowly work the vegetable mixture in to the crab until mixed thoroughly then season with lemon pepper, cayenne pepper, chopped parsley and celery salt. Fold mixture until seasoning coats the mixture evenly. (about 4 to 5 minutes) Once you have the crab mixture complete, take a large bowl and place rice and crab mixture in and fold together until crab and vegetables are evenly distributed. Put the mixture in a 9 X 13 baking dish and place in a 275 degree oven for 30 minutes.

The crab rice was served with steamed fresh broccoli as a side. One of the most interesting things about this dish is that it is very good cold over slices of fresh tomato with a light drizzle of balsamic vinegar.

Enjoy!

The Well Fed Cyclist

The things you find…(an “On the Edge” recipe)

You will never guess what was on sale this week! Go ahead, guess! Can’t guess? Well, okay, I will spill it, crab meat! I know that this may not excite everyone like it does me but it can only mean one thing (for me at least), stuffed fillet of sole or flounder! (You could use either because they are pretty much the same kind of fish, flat with thin filets) This is an older recipe of mine that has seen some modification over the years.   I most recently did a makeover of this recipe for the “On the Edge” series and nobody is the worse for wear. Gone is the whole cup and a half of regular breadcrumbs. These were replaced with a much smaller amount of whole wheat breadcrumbs which have a bigger flavor and texture. Also, less olive oil is used in this recipe to cut down on the fat and there is less salt. Overall, this is a much healthier version of the same recipe but the flavor is still there. As  a friend of my daughter’s put it, “it was like a party in my mouth!” I would normally serve this with a wild rice pilaf and green and wax beans but instead served this with a tabouli salad (cracked wheat) which had tomatoes, some onion and dressed with the juice of a lime. So without further adieu here is the recipe.

I’m Stuffed
Baked crab meat stuffed fillet of sole (or flounder)
(Serves 4)

Ingredients:
The Stuffing –
16 oz – Pasteurized claw crab meat
1/3 – Red bell pepper (diced fine)
1/3 – Green bell pepper (diced fine)
3 thin slices – Sweet onion (diced fine)
4 cloves – Garlic (fine minced)
¼ cup – Fresh parsley (a small handful) (diced fine)
¼ cup – Whole wheat Panko breadcrumbs
1 tbsp – Coarse ground black pepper
1 tsp – Kosher salt
2 splashes – Red wine vinegar
¼ cup (or less) – Extra virgin olive oil

The “Stuffee” –
1 lb – Sole or flounder fillets (you will need 4 fillets) (note: look for long fillets)

Construction Instruction (stuffing) –
Combine, crab meat, red bell pepper, green bell pepper, onion, garlic, breadcrumbs, parsley pepper and salt in a large bowl. Mix this together thoroughly making sure to break up the crab meat and combine the ingredients so they are evenly distributed through the mixture. Next take and add about half of the olive oil in the mixture and test. That is right, test. You have to do a “squish” test to see if the mixture will hold together. If the mixture holds together after you squish a ball together, it is ready but if not add enough oil until it does. (I would only add about half of what you had left and test again and repeat as necessary)

Construction Instruction (fish) –
Take the fillets and cut them lengthwise down the center into strips that are about 1 ½ to 2 inches wide. In a 9 X 13 baking dish that has been sprayed with PAM cooking spray, take a large spoon and with your hands create 4 equal mounds of the stuffing. Next, take the fillets and with the even edge on the bottom of the dish wrap around the base of each mound. Repeat this in the opposite direction with the other half of the fillet. (Note: the fillets will have a wide end and a thin end and the object will be to have the same amount of fish around the outside of the stuffing. This can be accomplished by matching the thin end of one fillet with the wide end of the other fillet.). Repeat this step for each mound of stuffing. What you should end up with are 4 mounds of stuffing where you can see the top of the mound and a circle of fish around the bottom. Make sure to put about 1/4 cup of water in the bottom of the baking dish. Bake this in an oven that has been preheated to 350 degrees for 30 to 35 minutes. You will know that it is done when the fish has gone from translucent to white or very, very light golden brown.

Enjoy!
The Well Fed Cyclist

It’s a “Two-fer”! Blasphemy (and the simple sauce) and NUTS!

I spent a lot of time yesterday “leaf herding” and doing those other activities that are supposed to prepare the homestead for the upcoming winter but is anyone ever really prepared for the upcoming winter? I know that I am not. The time got so late I wore out and did not do a post yesterday so there are two recipes for today.  The picture is of the hazelnut-rosemary encrusted tilapia mainly because I did not think that anyone would just want to see a pot of sauce.

First up, is the sauce recipe and I will have to write quickly because there is an angry mob of Italian grandmothers armed with giant soup spoons and a hanging rope made of old pasta trying to hunt me down.  They keep chanting “get the blasphemer, get the blasphemer!” I believe I could probably outrun them but you never know these days with souped up electric scooters and the like.  This is the 20 to 30 minute pasta sauce and a great alternative to the jarred sauces because you do get the fresh taste and not the oversalted garlic powder heavy taste of some sauces.  The key to being able to have a quick sauce is to have your ingredients in a state that will allow them to incorporate (get intimate) in a very short period of time, kind of like speed dating. This is the reason that dried powdered oregano is used and the onions and garlic are very finely diced. You are probably going to ask why not use dried basil and parsley and I would answer that the fresh give off more flavor in a shorter period of time than the dried ingredients. Without further delay here is the recipe.

It’s A Quickie (fast pasta sauce)

Gary Bechard – The Well Fed Cyclist

Ingredients:

2 – 15 ounce cans of tomato sauce (I used Muir Glen organic)

1 – 15 ounce can of tomato sauce, No Salt Added (I used Muir Glen organic)

4 – Very thin slices of medium sweet onion very finely diced

7 to 10 – Fresh basil leaves, thin sliced (chiffonade)

1 handful (about 3/4ths cup) – Fresh Parsley leaves, finely chopped

6 – Cloves garlic, finely chopped

A couple of good turns around the bottom of the pan with Extra Virgin Olive Oil

1 tbsp – Coarse ground black pepper

1 ½ tbsp – Lemon peel (grated)

Note: You can substitute the zest of a lemon

1 ½ tsp – Dried, powdered oregano leaves

1 tsp – Thyme leaves

A brief note before the construction instructions: I normally chop my vegetables ahead of time because it makes for easier cooking and cleaning. You may also notice that there is no salt listed in the ingredients and that is because 2 of the cans of tomatoes already have that in them. I am a big proponent of “taste as you go” and adjust to how you like it so do whatever floats your boat.

Construction Instructions:

In a 3 to 4 quart pot, do a few good turns around the bottom of the pot with some extra virgin olive oil. Turn the heat to mid range and bring the oil up to temperature remembering that olive oil has a low smoke point and does not withstand high heat very well without breaking down. When the oil is hot, add garlic and onions and sauté until the onions are translucent (kind of clear) and without turning the garlic brown. This process should take about 1 to 3 minutes because of the very fine chop you have on the garlic and onions. After the onions have released their water (sweating them to the oldies you could say), add the tomato sauces and stir mixture until it is fully pulled together. Next add your soft ingredients, basil, oregano, parsley, thyme leaves, and the black pepper and lemon zest and continue to stir. (Note: This is not a 4 to 5 hour sauce so you have to keep the sauce moving. You do not want the mixture to have uneven temperature.) Allow these ingredients to become intimate (cover the children’s eyes if you have to). Simmer until you start to see the parsley and the basil start to break down and become wilted (this will be around 10 minutes). Also, small bubbles will appear in the tomato sauce and once you see them reduce the heat to around 3 and continue to simmer for another 5 to 10 minutes. If you see that the sauce is becoming thicker than you would like you can add either some chicken or vegetable stock or red wine (my favorite) to thin it out. NEVER use water to thin because that destroys the integrity of the sauce. After the cooking time is done, I normally allow the sauce to “rest” by turning off the heat and letting sit partially covered on the stove.

Enjoy!

This is the second recipe and it is kind of a shorty but very, very tasty. I was eating some Marcona almonds with rosemary the other day and thought to myself, these would be really good as a coating for chicken or fish. I carried the idea around in  my head for several weeks playing around with the idea of tossing the rest of the bag into the food processor but I ended up eating them all and I finally decided to do something with the idea last night. I did not go the almond route because I thought that hazelnuts would have a better flavor profile and would still play nice with the rosemary and thyme.  I did the tilapia in a large cast iron skillet in canola oil but I believe that you could do the egg wash thing, coat them and bake them on a cookie sheet just as well.  I will be trying that with chicken here in the near future.

Nuts to You

(A coating for fish or chicken)

The Well Fed Cyclist – Gary Bechard

Ingredients:

2 cups – ground hazelnut flour

2 tbsp – rosemary leaves

1tbs – thyme leaves

1 tsp – Kosher salt

Thoroughly mix this in a bowl until all ingredients are evenly blended.

I did an eggwash of the tilapia, rolled the fillets in the mixture and gently put them in the cast iron skillet.  It took about 3 to 4 minutes a side until the fillet started to flake.

Enjoy!

The Well Fed Cyclist

The best thing I ever ate (and other fantasies)

This is an old blog post that I thought would go nicely with the upcoming cooler weather (such is Western Pennsylvania, you know, the four seasons? Waiting for winter; winter;  more winter and road construction)  I cannot lay claim to creating the four season’s description because I heard them somewhere in Maine actually. This recipe turned out very well and is replay worthy.  It was done at a time when I was unemployed and still in North Carolina. So, on with the show!

Tuesday, September 18, 2012

I know, I know, I am unemployed and am supposed to have all this time on my hands and I should be cranking out the recipes at a breakneck pace, writing the cookbook, discussing my next Food Network gig and becoming a “Food Star” extraordinaire but…that just ain’t happenin’. However, I will be more conscientious in making more posts because I have the job hunting machine up and running and it will need less of my time and I can devote more time to writing and creating.

Ah the human condition, it is such that since time immemorial we have sought out those things that bring us gastronomic pleasure. Whether it was the mastodon steak so prized by our Neanderthal ancestors (or other related hominid) or the chicken and dumplings that my Mere Mere did when I was a young lad, we all, or at least most of us, try to find those things that delight our palates and soothe our inner food souls.  We all remember a couple of types of dishes, the ones that are so over the top with flavour and stick out in our minds as exceptional and those, kind of like C-rations in the Army, that, well…kind of suck. As any followers of this blog know, I try to post things that are relatively easy to make with complimentary flavours to hopefully bring joy to the palate. In this vein, my son’s girlfriend, the lovely and talented Jess, honored me by paying me the compliment, “it was possibly the best thing I ever ate” and, “the fresh pineapple takes the flavours to the next level,”on the following recipe.  I wanted to share this recipe here today, late (as always), but here. I will be posting some other recipes this week, but this one is a jewel.

So there I was staring at the produce in the grocery store when the leeks started to speak to me.  It is not that I normally listen to vegetables but the leeks were very insistent that I use them in a recipe. (I really am not crazy or at least in my mind anyway) but after a relentless whispered discussion, I was seduced by my slender, green, onionesque, beauties. Having only used them for a soup stock and my Vietjapthainese Pho recipe, I was wondering how I was going to use them. I mean, I had not even picked out the protein for the dinner yet. How could I have been so impulsive to pick up a vegetable that I had yet to figure out with what I was going to use it?  Suddenly, I spied a sign, not that kind of sign silly, as no deity was involved in pointing out what I was to use for this meal…there was only talking vegetables, it was the “pineapples are on sale” sign. Into the basket the fresh pineapple went, then the mushrooms and some celery and finally, I chose a pork tenderloin as the protein for this meal. I named this recipe “The Happy Hurdler” and Jess you did a fine job getting over those hurdles. Without further adieu, here is the recipe.

The Happy Hurdler

Pork Tenderloin

(Serves 6)

Ingredients:

2.6 to 3.0 lbs – Pork tenderloin (should come in two pieces)

2 – Leeks thoroughly washed and dried (they tend to be a bit dirty)

1 pint – mushrooms (I used mixed mushrooms with shitake, creminis, portabello and others)

2 to 3 cups – Mushroom broth

½ tbsp – Ground ginger

½ tbsp – Ground nutmeg

½ tbsp – Coarse ground black pepper

1 – Pineapple, fresh, cored, quartered, and sliced thin

3 tbsp – Soy sauce (I use the light sodium version) Note: this amount is approximate as I just make a drizzle of soy sauce down the center of each tenderloin piece while in the baking dish.

Preparation – Take the leeks and cut the leaves right at where the green turns to white. Wash the leaves thoroughly as there will be quite a bit of dirt in there. On the end of the white part there will be root looking things and you need to cut those off and slice the white part very thin.  You should end up with what look like tiny onion slices. Put these in a bowl and set aside. Next make sure the mushrooms are all good and that most of the dirt has been brushed off.  Now for the pineapple, core and quarter and cut into ¼ inch slices. What you should end up with is a bunch of pineapple triangles.

Construction Instruction – In a deep 9” X 13” baking dish or similar dish (the one that I use is about 2 ½ “ to 3” deep) layer the leek leaves in the bottom creating a bed for the pork tenderloin. (the fluffier the better by the way) next lay the tenderloin halves on top of the bed side by side (kind of a Lucy and Ricky Ricardo thing). Next, take the mushroom broth and pour it over the pork. Then take and drizzle the soy sauce over each tenderloin followed by dusting each with the ginger, nutmeg, and black pepper. Using your “little onion rings), position them so that they are on each of the pork pieces with any leftovers put on to the leek bed. Next, take the mushrooms and also put them on the bed of leeks in and around the pork tenderloins. Now for the fun part, taking the pineapple slice triangles you have made layer them on top of the tenderloins using a slight overlap, making what looks like pineapple armor. All that is left is to put this in the oven at 325 degrees and bake, low and slow, until the internal temperature is at least 150 degrees.

I served this with steamed fresh broccoli with a bit of lemon pepper and baked rosemary and thyme baby red potatoes (limit the serving size of this to make sure carbs are in line).

Enjoy!

The Well Fed Cyclist

You stuffed what?! With What?!

Ever have a “Rock Star” moment? I actually had two in my last trip to the grocery store and was as giddy as a school girl when I got home because they do not happen that often (or often enough if you ask me). The first one was after I first picked out my Bok Choy cabbage heads. A lady walked up and asked me what type of greens they were and as I started explaining about 3 more ladies came up and started listening. I began to explain what I was going to do with them and told them that I had a food blog and that a recipe was going to be out there shortly.  They all pulled out paper and wrote down the address.  I felt kind of cool at that point. The second moment was while I was trying to find green onions for the stuffing mixture. A nice lady was standing there holding some wet broccoli, I happened to have a bag and let her use it because I did not see the green onions. She then told me that she had been standing there in front of them all the time and I told her what they were for. As I explained how I was going to make the stuffing, she nodded her head and it looked like she thought it was going to be pretty tasty. I told her I had a food blog and that I was going to put the recipe out there in a couple of days and SHE pulled out some paper and got the web address. I then felt really, really cool and even though I do not have a large number of followers at least it seemed like people were interested and they thought the food would taste good. I guess that is pretty sad that I think these encounters were “Rock Star”moments but I guess it is all in one’s perception. For me, I felt pretty good. Well, enough of that stuff and on to the recipe.

For many a week now, since the beginning of what should have been spring but has turned out to be a short stretch of “interesting” (in the Chinese curse sort of way) weather, I have been staring at the baby Bok Choy in the grocery store, not in an inappropriate way, mind you, and it is not that I believed that they were going to speak to me, like many vegetables have in the past but I always thought that I would be able to do something interesting with them in the kitchen but what? During my past visit to the store, I turned my attention to the mature Bok Choy to see what they had to offer saw those long luscious leaves and my mind started racing to see what I could come up with to use this vegetable.  Because the weather has been so cool lately it was reminding me of a stuffed cabbage dish that originated in Poland, Hungary and what was the East Bloc nations from the days of the USSR, called gwumpkies.  These are regular cabbage leaves stuffed with a mixture of either ground beef, pork or a combination of meats with rice. They are a pretty hearty meal and a nice comfort food for winter but really not suitable for the spring or summer because they are so heavy. So to that end, I really did not want to use any of the heavy meats because of the fat content and the tendency to make you want to hibernate or drink copious amounts of vodka so I began looking at the turkey and chickens of the world. Although, turkey and chicken were lighter, lots of people stuff Bok Choy with the ground version of the fowls so I turned my attention to the seafood I would normally eat in the summer. Crab was the first thought but was too damn expensive. The tunas, salmons and heaven forbid, Tilapia’s did not really appeal to me so I thought, shrimp!  And, that was the answer so a recipe was born. Bok Choy is used in a host of Asian dishes and I remember some Korean soldiers whose wives made Kimchee (pickled cabbage and onions) with it but I wanted something different and decided on stuffing the leaves.  My thoughts wandered to how to prepare the shrimp and I thought I would get the best flavor by roasting, as opposed to boiling, the shrimp. The dish is constructed in much the same way as gwumpkies and turned out amazing. (All of my test subjects loved them.) So without further adieu here is the recipe

This Ain’t no Ploy,

(Shrimp stuffed Bok Choy)

(Serves 4-6)

The Well Fed Cyclist

Gary Bechard

Ingredients:

2.0 lbs – Shrimp, 51 to 60 count, shelled and de-veined

1 1/2 cups – Jasmine rice, (I used Minute Rice for simplicity)

15 to 16 – Large Bok Choy leaves (You can count on getting 2 to 3 heads of Bok Choy, I just count the leaves while I am in the store before I head out)

1 cup – Green onions, chopped (Stuffing mixture)

1/3 cup – Mushrooms, fine chopped (Stuffing mixture)

¼ cup – Slivered almonds, chopped fine (Stuffing mixture)

1 – Celery stalk, (relatively large), fine diced (Stuffing mixture)

3/4 tsp – Ground ginger, (Shrimp coating)

2 tsp – Toasted sesame seed, (Shrimp coating)

1 tbsp – Coarse ground black pepper (Shrimp coating)

2 tbsp – Soy sauce (I use the light, low sodium version) (Shrimp coating)

¼ cup  – Peanut oil, (Shrimp coating)

1 tbsp – Toasted sesame oil, (Shrimp coating)

6 to 8 cups – Mushroom broth, (4 to 5 in which you will boil the rice and the rest will be for wilting the Bok Choy leaves)

¼ to ½ cup – Chicken stock (or mushroom broth) for the bottom of the baking dish

Frank’s Red Hot, Sweet Chili sauce (Thick) or Thai Sirracha chili sauce (for those who like a bit more spice in their life)

Preparation – Take the leaves off the Bok Choy by cutting them, or pulling them, off the bottom like you would a lettuce leaf. Wash each of the leaves thoroughly as there will be quite a bit of dirt in there and separate in a dish according to size (This will make more sense later). On the end of the white part cut off the end of the stem pretty close to where the green begins on the Bok Choy leaf and toss (or make a necklace, it is entirely up to you).  However, you will need a little bit of the stem when you are wilting the leaves. I also do the chopping first and place the ingredients in the refrigerator so that it saves time later.

Construction Instruction –

Shrimp Marinade and Roasting – In a large bowl, combine peanut oil, toasted sesame oil, soy sauce, toasted sesame seeds, ground ginger, and black pepper and whisk together until completely combined. Next, make sure the shrimp are defrosted (if you use frozen “fresh”) and toss them into the bowl with the marinade. Using your hands (it is really not that bad, come on) kind of toss the shrimp making sure that each has an equal amount of coating and spread these in a single layer on a large cookie sheet.  There is no need to coat with non-stick spray because the shrimp are already oiled (just like getting them ready to get a suntan).  Pre-heat the oven to 400 degrees, and roast the shrimp from 10 to 20 minutes or until they become firm making sure to flip them half way through the process. Set these aside and let them cool for a bit. Keep the cookie sheet out because you will want to have the oils and seasonings that are leftover for the mixture.

Rice – I use Minute rice because it is easy. Cook the rice according to the package directions in 4 to 5 cups of the mushroom broth, drain well and set aside.

Stuffing Mixture – Take your semi-cooled shrimp and toss those puppies into a food processor and pulse several times until the shrimp’s texture looks like cooked ground turkey.  Note: I use a small processor, small batches and very short pulses so that I do not liquidate the shrimp. When the pulsing is complete, put shrimp in a large bowl and add, cooked rice, green onions, mushrooms, almonds, and celery. Next, add the leftover oils and seasonings from the shrimp roasting and fold everything together until all the ingredients are thoroughly combined.

Creating the stuffed leaves – First, make your “production line”, you will need a large shallow skillet, a pretty large working area and your baking dish.  In the baking dish (a deep 9” X 13”) or similar dish (the one that I use is about 2 ½ “ to 3” deep) put about a ¼ inch (about a 1/3 cup) of chicken or mushroom stock in the bottom and place this at the end of your “production line). Next, put some stock in the bottom of the skillet and put on low heat. When the stock starts to steam a little start taking your Bok Choy leaves, largest ones first, about 2 at a time and wilt them in the stock. This will only take a couple of minutes each turning once so that you get the other side.  Note: You do not want them too wilted or they will not hold the mixture during the baking process. After you have wilted the first two and have placed the second 2 in the skillet, spread the leaves on your working area stem side toward you and place about a couple of tablespoons worth of the mixture in the center.  Then, take the stem side and fold over top of the mixture so that the end is at the edge of the pile of mixture, next, fold each side to the center and finally take the far end and fold toward you. Take the completed packet and place with the smooth side up in the baking dish. Repeat, this process until you have a layer of packets along the bottom of the baking dish. Cover the baking dish with aluminum foil. Pre-heat the oven to 350 degrees and bake for 35 to 40 minutes.

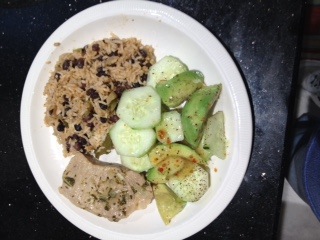
Plating – I plated these 2 to 3 per person and allow each person to put the amount of chili sauce they desire on top.  I served this with a double helping of stir-fried vegetables.

Enjoy!

The Well Fed Cyclist

How about Thanksgiving “On the Edge”…

I was thinking about Thanksgiving and how to approach this “carbfest”.  Most people will make the excuse, “it’s just once a year so where is the harm in that?”, nifty excuse but soon, since your body will have adapted to the higher calorie count and excess fat, you will be trying to score a turkey leg and some dressing from the local fat, sugar and salt pusher on the corner. It is a slippery slope my friends. When you look at what normally gets served for the main meal and even those things that are served prior to the meal the number of calories, sugars and carbohydrates are astounding. Each person will consume about 4,500 calories and 229 grams of fat according to the Calorie Control Council and that does not include the appetizers.

I think a “healthy” Thanksgiving would not make a person any the worse for wear. The turkey can be done over a bed of fresh vegetables, stuffed with aromatic herbs, with pierced lemons or oranges providing fragrant and needed moisture to the roasting. Here is a thought, maybe you could avoid having stuffing in the traditional sense. Its presence could be  replaced by…well…nothing! We used to have this very heavy (think bowling ball in the stomach for several days) Irish potato stuffing but knowing that there were enough carbohydrates in that to make a grown moose comatose we will abandon it this year because it is counterproductive to what we are trying to accomplish, a healthy Thanksgiving meal we will not regret. What would also be good served alongside the turkey is mashed sweet potatoes done with only cayenne pepper and cinnamon, yellow squash with red onions and sweet baby peas with pearl onions. For dessert, I am thinking a traditional pumpkin pie that has been modified to have no crust, no sugar and no fat (amazing right?!) and, having done a test run of this, it tasted the exact same as the unhealthy version. Also for dessert you could have a yogurt and fresh fruit parfait. This year one of the many stars of this meal will be served at the beginning. It will be disguised as an appetizer, butternut squash and apple soup (hot) and I am thinking served with a ginger snap (those really thin ones that the Moravian bakers make in Winston Salem, North Carolina).

As fate would have it, a number of years ago, I was asked if I had a good recipe for butternut squash and apple soup. After replying “no”, because I had never thought of putting those two things together in a soup, I decided to give it a go and see what I could come up with. Ruth (the “suggestee” in this case) said that she would try it too and we would compare recipes later. Well Ruth, here is the recipe. I understand that yours came out great and I hope that this compares favorably. As an aside, this soup would pair very nicely with a regular or turkey Reuben sandwich.

Say What Soup!
Butternut squash and apple soup
(Serves 4 – 6)

Ingredients:

32 oz (by weight) – butternut squash (cut into cubes of about 1 inch)
(Note: I was able to find pre-cut cubed butternut squash but in the absence of that you would essentially prepare the squash by cutting the squash almost like a watermelon taking off the rind and cubing the insides)
2 – Medium sweet apples (cored and quartered and…do not touch that skin)
(Note: I used Gala apples which are pretty firm and have a light color and sweetness)
4 tbsp – ground cinnamon
3 tbsp – ground roasted coriander
2 tbsp – ground nutmeg
1 tsp – kosher salt
32 oz – vegetable broth
A drizzle of canola oil

Preparation instructions:
Squash – On a large cookie/baking sheet arrange butternut squash cubes in a single layer on the cookie sheet and lightly drizzle canola oil over the top. Note: You do not have to be heavy handed here because the goal is only to lightly coat the squash so the dry ingredients stick. Then with your hands lightly toss the squash until they are coated with the oil. Next take 2 ½ tbsp of cinnamon, 3 tbsp of coriander, 1 tbsp nutmeg and 1 tsp of kosher salt and sprinkle over top of the squash. Once again toss with your hands to make sure each of the pieces are coated evenly with the ingredients.

Apples – In a ceramic baking dish, arrange the apple quarters skin side down and put about a half cup of water in the bottom. Next, evenly sprinkle 1 ½ tbsp of the cinnamon and 1 tbsp of the nutmeg over top of the apples.

Roast the squash and the apples at 450 degrees for 25 to 30 minutes and make sure to flip the squash at the 10 to 12 minute point. After these are done roasting, set these aside to cool. (normally about 10 to 15 minutes)

Construction Instruction:
First, take the squash cubes plus the flesh of the apples and put into a large bowl. With a potato masher, or other implement of destruction, mash the squash and the apples together trying to get the apples evenly distributed throughout the mixture. Next, working in small batches, take this mixture and put into a food processor or blender and slowly add a bit of the vegetable stock, then puree the mixture. (The mixture should be the consistency of runny apple sauce or thick creamy tomato soup). Take your first batch and put it into a large pot and repeat the process until all of the vegetable stock and squash and apple mixture have been used up and are in the pot. Heat this over low to medium heat until hot and serve with a small grind of fresh nutmeg on top.

Enjoy!

The Well Fed Cyclist

A “Manhattan Project” of my own…

There comes a time in the human existence where preservation of gastronomical integrity and taste is key. I have agreed to do an undertaking not unlike the original “Manhattan Project” which will help secure the human existence (or at least a small part of it).  It will not be as secret as the original but it will be carried out methodically and in a way as to preserve her anonymity. My mission, which I have decided to accept, is to teach a person with limited to “interesting” culinary skills to make food which will not look like the aftermath of a nuclear explosion or some random modern art piece at the MOMA. Some might say this is an epic if not impossible task but, I will persevere and teach this individual how to cook as it is my belief that everyone is able to cook. Even my daughter, who burnt a boiled egg and questioned the instructions on a can of soup that said “heat thoroughly”, can now cook good Asian and South American cuisine.  I believe that my project’s culinary adventures so far have created a self fulfilling prophecy of  sorts which doom her ingredients to…well…less than stellar results. It becomes a question of confidence at this point and bolstering that confidence, along with some basic cooking instruction, will help her see that she can cook. I must remember that “nuclear” (as in her current cooking style) is just an anagram for “unclear” , which may be something she is with regard to cooking.

Sorry there is no recipe today but tomorrow I will continue the “On the Edge” series of recipes with some about Thanksgiving so please stay tuned.

Enjoy!

The Well Fed Cyclist